CONFIGURATION DIAL-PEER
STEP 1
CONFIGURATION IP PHONES R1
CONFIGURATION VOICE VLAN 1 OR IP PHONES
CONFIGURATION DIAL-PEER ON R1
ROUTER RIP CONIGURATION R1
STEP 2
CONFIGURATION IP PHONES R2
CONFIGURATION VOICE VLAN 1 OR IP PHONES
CONFIGURATION DIAL-PEER ON R2
ROUTER RIP CONIGURATION R2
__________________
STEP 1

IP ADDRESS CONFIGURE ON R1 CONFIGURATION MODE.
Router(config)# hostname R1
R1(config)# interface FastEthernet0/1
R1(config-if)# ip address 1.1.1.1 255.0.0.0
R1(config-if)# no shutdown
R1(config-if)# interface FastEthernet0/0
R1(config-if)# ip address 192.168.1.1 255.255.255.0
R1(config-if)# no shutdown
R1(config-if)# exit
DHCP CONFIGURATION ON R1.
R1(config)# ip dhcp pool manan
R1(dhcp-config)# network 192.168.1.0 255.255.255.0
R1(dhcp-config)# default-router 192.168.1.1
R1(dhcp-config)# option 150 ip 192.168.1.1
R1(dhcp-config)# exit
CONFIGURATION IP PHONES ON R1.
R1(config)# telephony-service
R1(config-telephony)# max-ephones 2
R1(config-telephony)# max-dn 2
R1(config-telephony)# ip source-address 192.168.1.1 port 2003
R1(config-telephony)# auto assign 1 to 2
R1(config-telephony)# ephone-dn 1
R1(config-ephone-dn)# number 101
R1(config-telephony)# ephone-dn 2
R1(config-ephone-dn)# number 102
R1(config-ephone-dn)# exit
CONFIGURATION ROUTER RIP ON R1.
\
R1(config)# router rip
R1(config-router)# network 1.0.0.0
R1(config-router)# network 192.168.1.0
CONFIGURATION DIAL-PEER ON R1.
R1(config) dial-peer voice 1 voip
R1(config-dial-peer)# destination-pattern 5..
R1(config-dial-peer)# session target ipv4:172.165.1.1
GO TO SWITCH CONFIGURATION MODE AND ENTER COMMANDS.
________________
STEP 2
IP ADDRESS CONFIGURE ON R1 CONFIGURATION MODE
Router(config)# hostname R2
R2(config)# interface FastEthernet0/0
R2(config-if)# ip address 1.1.1.1 255.0.0.0
R2(config-if)# no shutdown
R2(config-if)# interface FastEthernet0/1
R2(config-if)# ip address172.165.1.1 255.255.0.0
R2(config-if)# no shutdown
R2(config-if)# exit
DHCP CONFIGURATION ON R1.
R2(config)# ip dhcp pool Hanan
R2(dhcp-config)# network 172.165.1.0 255.255.0.0
R2(dhcp-config)# default-router 172.165.1.1
R2(dhcp-config)# option 150 ip 172.165.1.1
R2(dhcp-config)# exit
CONFIGURATION IP PHONES ON R1.
R2(config)# telephony-service
R2(config-telephony)# max-ephones 2
R2(config-telephony)# max-dn 2
R2(config-telephony)# ip source-address 172.165.1.1 port 2003
R2(config-telephony)# auto assign 1 to 2
R2(config-telephony)# ephone-dn 1
R(config-ephone-dn)# number 101
R2(config-telephony)# ephone-dn 2
R2(config-ephone-dn)# number 102
R2(config-ephone-dn)# exit
CONFIGURATION ROUTER RIP ON R1.
R2(config)# router rip
R2(config-router)# network 1.0.0.0
R2(config-router)# network 172.165.1.0
CONFIGURATION DIAL-PEER ON R1.
R2(config) dial-peer voice 1 voip
R2(config-dial-peer)# destination-pattern 1..
R2(config-dial-peer)# session target ipv4:192.168.1.1
________________
PING PC1 TO PC0 FOR CHECK COMMUNICATION BETWEEN NETWORK.
C:\>ping 192.168.1.2

CHECK COMMUNICATION BETWEEN IP PHONE.

THEN PICK THE CALL WILL BE CONNECTED.
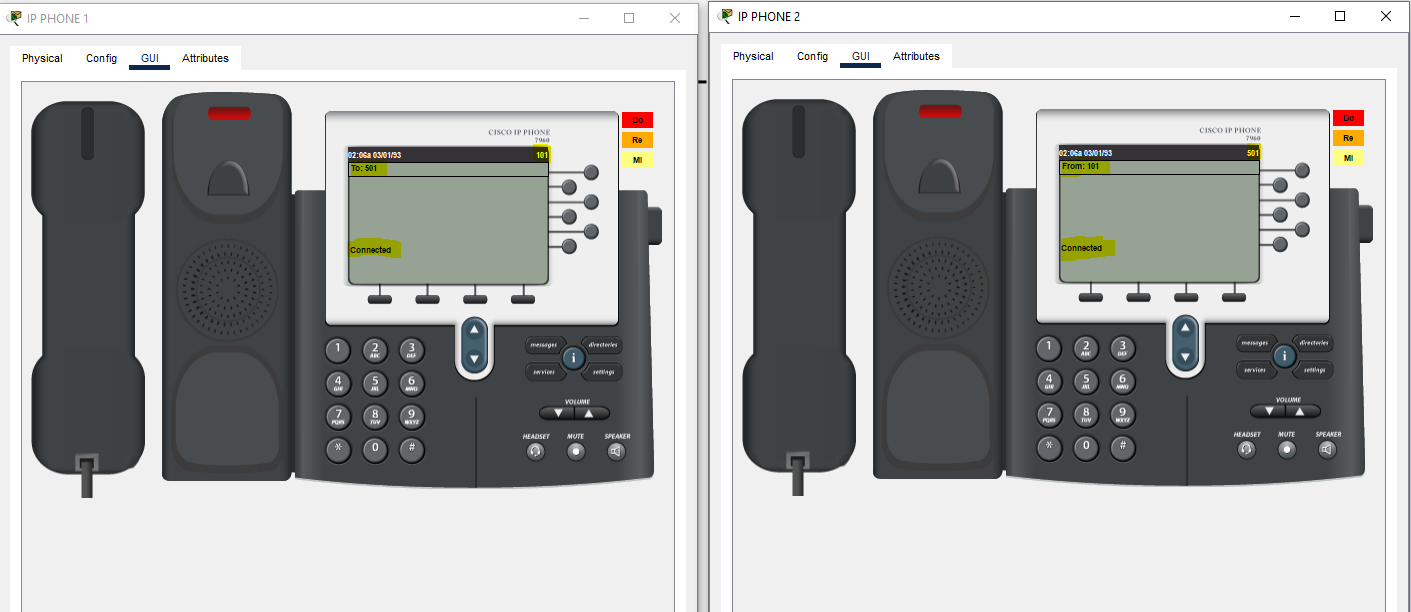
SO CONFIGURATION COMPLETED DIAL-PEEER.
-------------------------
Comments
Post a Comment